Nhiều bạn đọc trên zubi.cloud có hỏi, khi bạn tạo một form tại google drive biểu mẫu. vấn đề bạn thường gặp là khi có người đăng ký thì tin nhắn đó sẽ gửi vào đâu, và làm thế nào để nó thông báo vào mail của bạn. Hôm nay zubi.cloud sẽ hướng dẫn các bạn cài đặt để nhận Email khi có đơn hàng, hoặc có người đăng ký bằng google drive.
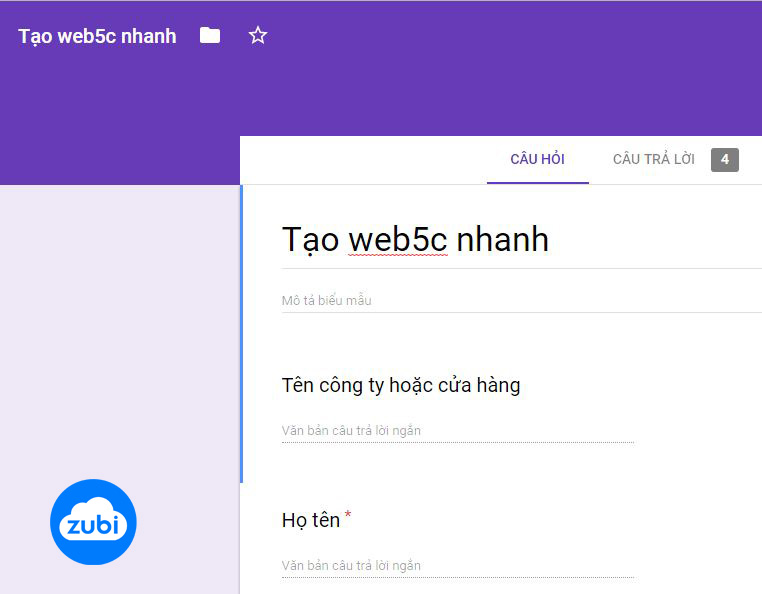
Bước 1: Tạo 1 form google drive tại drive.google.com.
Mới –> Ứng dụng khác –> Google biểu mẫu–> ra 1 biểu mẫu –> click vào dấu ? ở góc phải mà hình chọn quay lại biểu mẫu cũ.
Form sẽ gồm:
+ Tiêu đề
+ Mổ tả biểu mẫu
+ Các thu mục do bạn tạo.( đủ các tính năng)
+ Xong khi tạo xong bạn –> Ân gửi Biểu mẫu –> đã xong
Bước 2: cài đặt trả lời khi có người gửi biểu mẫu
Ấn vào xem câu trả lời –> Tạo –> biểu mẫu sẽ tử gửi câu trả lời vào 1 bảng Ex cho bạn ở googe drive. Bây giờ nhiệm vụ là chuyển thông tin đó thông báo vào mail.
Bước 3: Đây là những bước tiến hành nhận thông báo qua mail cho các bạn. Sau khi đã tạo được mẫu câu trả lời vào trong google drive bạn click vào Mẫu Câu Trả Lời đó.
Cài đặt đoạn script trình lệnh.
Trên thanh điều hướng bên trên top –> Công cụ –> trình chỉnh sử tệp lệnh…–> Ra 1 tab khác ” Dự án………..” –> Bạn copy đoạn code dưới và Paste đè ( ghi đè) lên đoạn code trong đó. –> Lưu lại (ctrl+S) 1 tên dự án bất kỳ ban muốn.
function Initialize() {

  var triggers = ScriptApp.getProjectTriggers();

  for(var i in triggers) {
    ScriptApp.deleteTrigger(triggers[i]);
  }

  ScriptApp.newTrigger("SendGoogleForm")
  .forSpreadsheet(SpreadsheetApp.getActiveSpreadsheet())
  .onFormSubmit()
  .create();

}

function SendGoogleForm(e)
{
  try
  {
    // You may replace this with another email address
  var email = "taoweb5c@gmail.com";

    // Optional but change the following variable
    // to have a custom subject for Google Form email notifications
    var subject = "Liên hệ web5c...";

    var s = SpreadsheetApp.getActiveSheet();
    var columns = s.getRange(1,1,1,s.getLastColumn()).getValues()[0];
    var message = "";

    // Only include form fields that are not blank
    for ( var keys in columns ) {
      var key = columns[keys];
      if ( e.namedValues[key] && (e.namedValues[key] != "") ) {
        message += key + ' :: '+ e.namedValues[key] + "\n\n";
      }
    }

    // This is the MailApp service of Google Apps Script
    // that sends the email. You can also use GmailApp for HTML Mail.

    MailApp.sendEmail(email, subject, message);

  } catch (e) {
    Logger.log(e.toString());
  }

}
Bạn sửa địa chỉ mail thành địa chỉ mail bạn muốn gửi.
– Kích hoạt
Vẫn trên tab đó trên thanh điều hướng –> Tài nguyên –> tất cả các tài nguyên –> Click vào chưa kích hoạt nào được …. nhấn vào đây để thêm một kích hoạt ngay bây giờ.
Sau khi thiết lập xong –> ấn lưu lại –> Xem xét các quyền (tiếp tục) –> Chấp nhận. Vậy là bạn đã cài đặt xong. Giờ ra test xem đã có thông báo về mail của các bạn chưa.
Chúc các bạn thành công!
Sau đây là mẫu code để tùy biến Google Form theo ý thích, bạn chỉ cần viết CSS lại thôi nhé
<div class="google-form-web5c">
<form action="https://docs.google.com/forms/d/e/1FAIpQLSdwHK34nwA2On4xcOy68pjlGbKtkcCO9tBKrRHK3sTdl9qYoQ/formResponse" class="blockform" id="form_dathang contact" method="POST" onsubmit="return emptycart()" style="display: block;" target="hidden_iframe">

<div class="modal-header"> <h3>Đăng ký tạo web5c chuyên nghiệp</h3>
<p class="content">Trải nghiệm toàn bộ tính năng web bán hàng với hệ thống thiết kế web5c</p>
</div>

<ul>
<li><input type="text" class="quantumWizTextinputPaperinputInput exportInput" autocomplete="off" tabindex="0" placeholder="Tên công ty hoặc cửa hàng" aria-label="Tên công ty hoặc cửa hàng" aria-describedby="i.desc.1168093214 i.err.1168093214" name="entry.470141500" value="" required="" dir="auto" data-initial-dir="auto" data-initial-value=""></li>

	<li><input type="text" class="quantumWizTextinputPaperinputInput exportInput" autocomplete="off" tabindex="0" placeholder="Địa chỉ" aria-label="Địa chỉ" aria-describedby="i.desc.714024938 i.err.714024938" name="entry.1175505231" value="" required="" dir="auto" data-initial-dir="auto" data-initial-value=""></li>

		<li><input type="text" class="quantumWizTextinputPaperinputInput exportInput" autocomplete="off" tabindex="0" placeholder="Lĩnh vực kinh doanh" aria-label="Lĩnh vực kinh doanh" value="" required="" dir="auto" data-initial-dir="auto" data-initial-value=""></li>

<div class='google-form-web5c-colum'>
	<li><input type="text" class="quantumWizTextinputPaperinputInput exportInput" autocomplete="off" tabindex="0" placeholder="Họ tên" aria-label="Họ tên" aria-describedby="i.desc.1590945289 i.err.1590945289" name="entry.1860978732" value="" required="" dir="auto" data-initial-dir="auto" data-initial-value=""></li>

	<li><input type="text" class="quantumWizTextinputPaperinputInput exportInput" autocomplete="off" tabindex="0" placeholder="Điện thoại" aria-label="Điện thoại" aria-describedby="i.desc.62174973 i.err.62174973" name="entry.288617180" value="" required="" dir="auto" data-initial-dir="auto" data-initial-value=""></li>
</div>

	<li><input type="email" class="quantumWizTextinputPaperinputInput exportInput" autocomplete="off" tabindex="0" placeholder="Email" aria-label="Email" aria-describedby="i.desc.1072586487 i.err.1072586487" name="entry.1198338606" value="" required="" dir="auto" data-initial-dir="auto" data-initial-value=""></li>

	<li><input type="text" class="quantumWizTextinputPaperinputInput exportInput" autocomplete="off" tabindex="0" placeholder="Mật khẩu (sử dụng khi đăng nhập quản trị web)" aria-label="Mật khẩu" aria-describedby="i.desc.773494405 i.err.773494405" name="entry.467880048" value="" required="" dir="auto" data-initial-dir="auto" data-initial-value=""></li>
	<li><input class="btn btn-md btn-default" name="submit" type="submit" id="button" value="Tiếp tục">	</li>
</ul>
	</form>
	</div>

	<div class="hidden-message alert-box success" style="display: none;">
    Cảm ơn bạn! Chúng tôi sẽ sớm liên lạc với bạn trong thời gian sớm nhất.
    </div>

	<iframe id="hidden_iframe" name="hidden_iframe" onload="if(submitted){}" style="display: none;"></iframe>
<script type="text/javascript">
    var submitted = false;

    function emptycart() {
        submitted = true;
        $('.blockform').toggle();
        $('.hidden-message').show();
    }
    $("iframe#hidden_iframe").on('load', function() {
        simpleCart.empty();
    });
</script>
Tìm kiếm thêm: hướng dẫn cài đặt form google drive gửi thông báo vào mail, nhận email khi có người đăng ký, google form, google form responder, function trong google form
